Home page of this blog

Thursday, December 1, 2011

IP alias or virtual ip address in Ubuntu Linux


Introduction 

Sometimes same physical ethernet device may need to impersonate to the outside world as n devices or n ip addresses. This maybe helpful in hosting n different servers without a need to goto n physical devices. Here comes the idea of virtual alias

Creating virtual ip or ip alias (this works in ubuntu)

Say my ipaddress is 192.168.2.2 and my ethernet device is eth0

then to create an ip alias 192.168.2.6 (provided this ip is not used by any in the network)


sudo ip addr add 192.168.2.6 dev eth0

To list down the alias names created

sudo ip addr show


Testing with a server hosted on two different ip now and see if it really works


To utilize the newly created alias I created a small webserver in java (java is super duper easy to test and I love java, C programmers can write the same code but with lots of lines and error handling … so leaving it for performance nuts, since this is just a concept I am sticking with java and I feel java is like scripting to me and free flowing from all my limbs, eyes and hands)

Again to compile/execute java you need openjdk or sun jdk
Name of program ServerTest.java


import java.net.*;
import java.io.*;
import java.util.*;

public class ServerTest implements Runnable
{

ServerSocket ser;
InetAddress inetAddress;

public ServerTest(byte[] address) throws Exception
{
inetAddress = InetAddress.getByAddress(address);

ser = new ServerSocket(80, //port of webserver
10, //backlog of 10
inetAddress);

Thread t = new Thread(this);

t.start();
}

public void run()
{

while(true)
try
{
Socket client = ser.accept();

InputStream inStream = client.getInputStream();
OutputStream outStream = client.getOutputStream();

BufferedReader in = new BufferedReader(new InputStreamReader(inStream));
PrintWriter out = new PrintWriter(outStream, true);


String line = in.readLine();

System.out.println(line);

String[] tokens = line.split(" ");

String method = tokens[0];
String uri = tokens[1];
String protocol = tokens[2];

out.println(protocol + " 200 OK");
out.println("Content-Type: text/html");


String greeting = "<html><body><h1>Welcome from " + inetAddress + "</h1></body></html>";


out.println("Content-Length: " + greeting.length());

out.println();

out.println(greeting);

out.close();
in.close();

}
catch(Exception ex)
{
ex.printStackTrace();
}
}

public static void main(String[] args) throws Exception
{
new ServerTest(new byte[]{(byte)192, (byte)168, (byte)2, (byte)6});
new ServerTest(new byte[]{(byte)192, (byte)168, (byte)2, (byte)2});
}
}


I assumed this program is pure http 1.1,  I will dissect and explain this program at the end of this article

to compile I used javac as follows

javac ServerTest.java

to run the program requires root privileges in Linux/Unix as I am listening on port 80 (if you want listen on some other port say 27000 which wont require root permissions, but while requesting webpage from browser, you need to use :27000 … and I am dead lazy )

so to run

sudo java ServerTest


and it will display nothing unless some browser hits this server…

Just wait, open another system/ipad/ipod touch/iphone/android phone/netbook/notebook/another device with a browser connected to same domain as the system running this java program

Here for testing, I opened my ipad browser

and accessed 192.168.2.2 (and it displayed a welcome with this ip identification), then accessed 192.168.2.6 (and it displayed welcome with this ip identification)


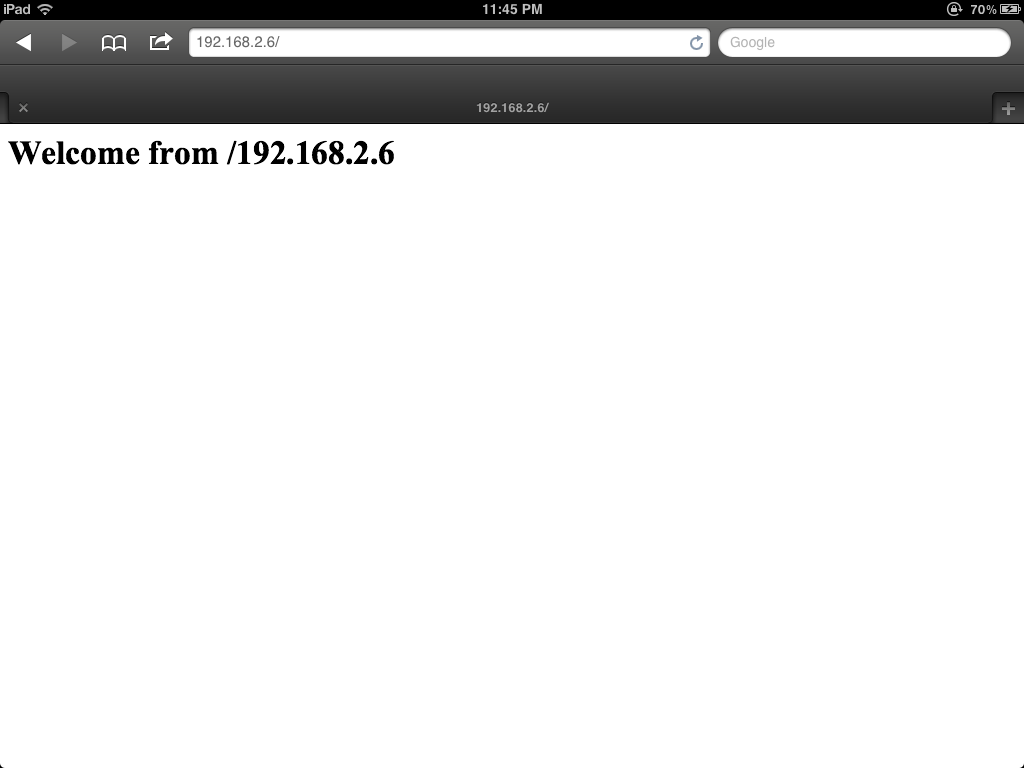
So what does it tell, each ip is virtual on its own, as good as a physical network. If you have linux and you are empowered (so dont buy another NIC … just create virtual ip and host different servers)

What say you?


Before winding up the article, here is a brief explanation of http protocol

Request comes from browser and response is given back from the server.

http request comes like this

METHOD URI PROTOCOL\r\n
Header-Name1: value\r\n
Header-Name2: value\r\n
\r\n
Entity or data


where each header-name is a key separated from value by colon and space
Each line ends with \r\n (CRLF)
and before data another blank line or CRLF

and followed by data. Usually headername almost always has Content-Length


and I parse the first line from the request thus

String line = in.readLine();

System.out.println(line);

String[] tokens = line.split(" ");

String method = tokens[0];
String uri = tokens[1];
String protocol = tokens[2];


see in.readLine() gets the first line from browser (once all tcp connections are made)

and I am using java’s powerful string to tokenize the line with space as delimiter (use strtok in C)

and the first token is method (which can be GET or POST or …)
and second is URI
third is protocol used by browser

I take the protocol and send back to the browser in my response

out.println(protocol + " 200 OK");
out.println("Content-Type: text/html");


String greeting = "<html><body><h1>Welcome from " + inetAddress + "</h1></body></html>";


out.println("Content-Length: " + greeting.length());

out.println();

out.println(greeting);

out.close();
in.close();


HTTP Response is of the form

PROTOCOL STATUSCODE MESSAGE\r\n
Header-Name1: value1\r\n

\r\n
Entity or data


See the line

String greeting = "<html><body><h1>Welcome from " + inetAddress + "</h1></body></html>";


Here I compose the greeting with the identifying virtual ip address (it means this instance is unique and tied only to its clients, not to clients of some other virtual ip address!!!!!!)

Rest I assume you would follow from code

References for virtual ip address on linux I followed and java it is my own or I wrote it for testing myself. HTTP well it is a protocol, go refer yourself

http://itsecureadmin.blogspot.com/2007/02/creating-virtual-ip-addresses-on-linux.html

Monday, November 21, 2011

Custom 64 bit Ubuntu Kernel 3.1.1 optimized for i3, i5 and i7

Let me be terse

For building refer http://duopetalflower.blogspot.com/2011/10/custom-64-bit-ubuntu-kernel-31.html

Kernel 3.1.1 optimized with corei7 march, kernel frequency of 1000 HZ and processor selected as CORE2 (only built for 64 bit) with Ubuntu patches. The resulting deb binary are installable on ubuntu/mint systems

Kernel binary and buildscript zipped can be downloaded from the following mediafire link (
whose sha256sum is
38703cc653dde3bc3b0645393106ab4efff08ec362af0e0961c9dd8d2d09a8b1  Kernel3.1.1-i7.zip)

Buildscript can be downloaded from this mediafire link (whose sha256sum is 258c153288eb8a9a735e83a86e76cdfa7d2658eb75c6dc8b0a160bf4cc2f4fd9  buildscript-kernel3.1.1-i7.sh)

Some screenshots

While building, can see how RAM is utilized efficiently by linux kernel


While installing the newly built kernel


After installation and rebooting into new kernel


Wednesday, October 26, 2011

Custom 64 bit Ubuntu Kernel 3.1 optimized for i3, i5 and i7


Kernel 3.1

I built the 64bit kernel 3.1 for my Kubuntu 11.10 desktop optimized for i7. Here is the screenshot of the kernel in action


Feel of the new kernel 3.1 seems to be very exciting. Kubuntu booted to login screen within 10 seconds. (With default kernel it took more than 20 seconds to boot Kubuntu 11.10 unlike ubuntu 11.10 which was faster to boot)

Here is how I built the kernel 3.1 Ubuntu way (in short 7 steps)

In brief
  1. Install build dependencies
  2. Download kernel source and ubuntu patches
  3. Extract and apply ubuntu patches
  4. Create a new flavour and tweak kernel config
  5. Modify Makefile for optimization
  6. Build
  7. Reboot and Enjoy

In detail

Install build dependencies

Open terminal/konsole and execute the following apt-get commands if you don't have essential build packages necessary for building kernel from source in Ubuntu


#Install Build essential to build kernel

sudo apt-get install fakeroot build-essential crash kexec-tools makedumpfile kernel-wedge libncurses5 binutils-dev libelf-dev libdw-dev libnewt-dev libncurses5-dev


sudo apt-get  --no-install-recommends install asciidoc xmlto

Download kernel source and ubuntu patches

Download the source of newly released linux kernel 3.1. The following wget -c makes it simple to download from commandline


#Download kernel source


wget -c http://www.kernel.org/pub/linux/kernel/v3.0/linux-3.1.tar.bz2


Here is how to download the 3.1 ubuntu patches

#Download ubuntu patches
wget -c http://kernel.ubuntu.com/~kernel-ppa/mainline/v3.1-oneiric/0001-base-packaging.patch
wget -c http://kernel.ubuntu.com/~kernel-ppa/mainline/v3.1-oneiric/0002-debian-changelog.patch
wget -c http://kernel.ubuntu.com/~kernel-ppa/mainline/v3.1-oneiric/0003-default-configs.patch


Extract and apply ubuntu patches

Extract downloaded kernel source and apply patches. Here I used tar to unzip the bzip tarball and patch to apply the patch


#Extract kernel source


tar xjvf linux-3.1.tar.bz2


#Create a soft link 

ln -s linux-3.1 linux


#Enter linux directory

cd linux

#Apply the patches

patch -p1 < ../0001-base-packaging.patch 
patch -p1 < ../0002-debian-changelog.patch 
patch -p1 < ../0003-default-configs.patch


Create a new flavour and tweak kernel config

Before creating a new flavor, give execute permissions to debian build scripts for building the kernel properly


#make debian/rules as executable

chmod -Rv +x debian/rules

#make debian/scripts directory executable

chmod -Rv +x debian/scripts/

To create a new flavour, just clone from generic flavor, here is how

#create i7 flavor
cp debian.master/config/amd64/config.flavour.generic debian.master/config/amd64/config.flavour.i7

Do the kernel configuration, I selected processor type as CORE2 and kernel frequency to 1000HZ (just give y only to the newly created flavor when executing editconfigs)


#clean
fakeroot debian/rules clean
fakeroot debian/rules updateconfigs
#give y only to i7 flavor, leave the rest untouched
fakeroot debian/rules editconfigs

Copy the abi related files from existing generic flavor and tweak to reflect the newly created flavor

#copy the abi entries for i7 flavor and add i7 entries in vars and amd64.mk
cp debian.master/abi/3.0.0-12.20/amd64/generic debian.master/abi/3.0.0-12.20/amd64/i7
cp debian.master/abi/3.0.0-12.20/amd64/generic.modules debian.master/abi/3.0.0-12.20/amd64/i7.modules
sed -i s/getall\ amd64\ generic\ server\ virtual/getall\ amd64\ generic\ server\ virtual\ i7/g debian.master/etc/getabis
sed -i s/\=\ generic\ server\ virtual/\=\ generic\ server\ virtual\ i7/g debian.master/rules.d/amd64.mk
cp debian.master/control.d/vars.generic debian.master/control.d/vars.i7
sed -i s/\"Generic\"/\"core\ i7\"/g debian.master/control.d/vars.i7


Modify Makefile for optimization

This is the place where we apply the optimizations. Ubuntu 11.10 comes with gcc 4.6 which has added new architectue corei7


#edit arch/x86/Makefile and arch/x86/Makefile_32.cpu if you want to tweak the march and mtune params of gcc

vi Makefile

vi arch/x86/Makefile

vi arch/x86/Makefile_32.cpu

In the main makefile, I changed HOSTCC and HOSTCXX to look as follows


HOSTCC       = gcc -march=corei7 -mtune=corei7 -pipe

HOSTCXX      = g++ -march=corei7 -mtune=corei7 -pipe


In other makefiles, replace lowercased core2 with corei7 (simple isn't it?)

Build

Do a clean build


#clean and build

fakeroot debian/rules clean


The following builds the common header and source debs

skipabi=true skipmodule=true fakeroot debian/rules binary-indep

The following builds the newly created flavor. Note I added no_dumpfile=yes as it was not building the dumpfile.

time skipabi=true skipmodule=true no_dumpfile=yes fakeroot debian/rules binary-i7

Wait for sometime (depends on speed of your processor). No need to tweak concurrency settings, which are taken care automatically. Install the newly built debs as follows after going one directory above

cd ..

sudo dpkg -i linux-headers-3.1.0-030100_3.1.0-030100.201110241006_all.deb linux-headers-3.1.0-030100-i7_3.1.0-030100.201110241006_amd64.deb linux-image-3.1.0-030100-i7_3.1.0-030100.201110241006_amd64.deb

Reboot and Enjoy

To test the newly built kernel, reboot and select the newly installed kernel from grub. If the newly installed kernel does not boot for some reason, do not panic, select the old ubuntu kernel and boot. (Grub2 does not wait beyond 3 seconds if there is no other OS present and very annoying, press escape within first 3 seconds to display the grub menu if it does not display) Follow this to know more about how to customize grub2 http://maketecheasier.com/mastering-grub-2-the-easy-way/2009/11/19

or

https://wiki.ubuntu.com/Grub2

sudo reboot

Download links

I have uploaded the kernel 3.1 debs which I built and use.  If you don't want to build yourself you can try these.

Here are the SHA256SUM checksum


8d1c58d614056b3cb2e05562d1108cd0a25aa7900ea02f602e8da7a6ead00c83  buildscript.sh

3cbd100b33734330f6b4da7a25cce5c0a45db9cee16bf609c554cbc9cd7b3f98  linux-headers-3.1.0-030100_3.1.0-030100.201110241006_all.deb

6ad9338017182590ef791ed12bbcaf0857090fb6028ec90b6d81ea04c38948f5  linux-headers-3.1.0-030100-i7_3.1.0-030100.201110241006_amd64.deb

e1d62da1add7bfc0b9976fac7d8be32512da8eb09c5b41a6ab66b8c43d12b52e  linux-image-3.1.0-030100-i7_3.1.0-030100.201110241006_amd64.deb

Here are the download links


Tuesday, October 18, 2011

Ubuntu Oneiric Kernel Compilation


This tries to document how to build custom kernel for amd64 architecture the ubuntu way.

Install dependencies

These dependencies are required for building linux kernel


sudo apt-get install fakeroot build-essential crash kexec-tools makedumpfile kernel-wedge libncurses5 binutils-dev libelf-dev libdw-dev libnewt-dev libncurses5-dev

sudo apt-get --no-install-recommends install asciidoc xmlto

sudo apt-get build-dep linux


Get kernel source code


Create a new folder/directory, this should be in a partition which has atleast 10 GB free space 

mkdir Builds
cd Builds
apt-get source linux-image-$(uname -r)


Work on copy of the kernel source


Take a copy of the kernel downloaded. By mistake some setting is changed, we can work on another fresh copy

cp linux-3.0.0 linux -r
cd linux

Create a new flavour


Here is giving execute permissions to debian build scripts before creating a new flavour

#make debian/rules as executable
chmod -Rv +x debian/rules
#make debian/scripts directory executable
chmod -Rv +x debian/scripts/

Here I create an i7 flavour (which should run on i3, i5 and i7)

#create i7 flavor
cp debian.master/config/amd64/config.flavour.generic debian.master/config/amd64/config.flavour.i7
#clean
fakeroot debian/rules clean
fakeroot debian/rules updateconfigs

Here is the place where we give kernel configuration (I changed kernel frequency from 250 HZ to 300 HZ and changed processor to CORE2)

#give y only to i7 flavor, leave the rest untouched
fakeroot debian/rules editconfigs

The following are to do with the ABI settings which we clone from existing Ubuntu and modify just the names to reflect our flavour

#copy the abi entries for i7 flavor and add i7 entries in vars and amd64.mk
cp debian.master/abi/3.0.0-12.19/amd64/generic debian.master/abi/3.0.0-12.19/amd64/i7
cp debian.master/abi/3.0.0-12.19/amd64/generic.modules debian.master/abi/3.0.0-12.19/amd64/i7.modules
sed -i s/getall\ amd64\ generic\ server\ virtual/getall\ amd64\ generic\ server\ virtual\ i7/g debian.master/etc/getabis
sed -i s/\=\ generic\ server\ virtual/\=\ generic\ server\ virtual\ i7/g debian.master/rules.d/amd64.mk
cp debian.master/control.d/vars.generic debian.master/control.d/vars.i7
sed -i s/\"Generic\"/\"core\ i7\"/g debian.master/control.d/vars.i7

Modify makefile


vi Makefile


I changed only the main makefile HOSTCC and HOSTCXX as follows

HOSTCC       = gcc -march=corei7 -mtune=corei7
HOSTCXX      = g++ -march=corei7 -mtune=corei7


These are other makefiles to have a look at

vi arch/x86/Makefile
vi arch/x86/Makefile_32.cpu

Build


Clean before doing a build

#clean and build
fakeroot debian/rules clean

Just build and Ubuntu will take care of creating concurrent builds based on your processor count

skipabi=true skipmodule=true fakeroot debian/rules binary-indep
time skipabi=true skipmodule=true fakeroot debian/rules binary-i7

Install

The built deb packages are in the parent directory, so change to previous directory

cd ..

The following installs the newly created flavour

sudo dpkg -i linux-headers-3.0.0-12_3.0.0-12.20_all.deb linux-headers-3.0.0-12-i7_3.0.0-12.20_amd64.deb linux-image-3.0.0-12-i7_3.0.0-12.20_amd64.deb

Reboot and enjoy

Here is screenshot showing i7 kernel in gnome-system-monitor


P.S: If you are lazy or scared to build your own custom kernel, wait till tonight. I am starting to office ... and will upload tonight

Here is the i7 optimized builds which I am using and can be used on any 64bit i3, i5 or i7

Kernel Image :  http://www.mediafire.com/file/tb9fo7omoaa8pxc/linux-image-3.0.0-12-i7_3.0.0-12.20_amd64.deb
Kernel Headers : http://www.mediafire.com/file/47s4dkbz5bf8ij3/linux-headers-3.0.0-12-i7_3.0.0-12.20_amd64.deb
Kernel Headers All : http://www.mediafire.com/file/ktw2d9d2qoyh3yz/linux-headers-3.0.0-12_3.0.0-12.20_all.deb
Oneiric Kernel Build Script : http://www.mediafire.com/file/pn3xmszxl9sy9cr/OneiricKernelCompilation.sh

SHA256SUMS-Oneiric.txt : http://www.mediafire.com/file/wvun5qrjim04j7q/SHA256SUMS-Oneric.txt


SHA256SUMS


ba00c0c3ee5d0875ea961f2ff4c7e54c460eb298b22c58e85d570f112ca323dd  linux-headers-3.0.0-12_3.0.0-12.20_all.deb
dcf30712689180ea6bb4d7d361c6660063c3a446531313989ee968deb9aa4927  linux-headers-3.0.0-12-i7_3.0.0-12.20_amd64.deb
f587a9d5ea51c5ec39b633b2ed64e63b06b9bc34dc25137729d6e969ce424766  linux-image-3.0.0-12-i7_3.0.0-12.20_amd64.deb
ed287ac072c0ee94cc79fd274cf81659259d06b244b70664ef95acc3ea507ec9  OneiricKernelCompilation.sh